All the s’mores flavor without the campfire drama. Just mix, roll, chill… and snack. Perfect for movie nights and cravings.
So yeah… I started making Smores Snack Bites instead. No campfire. No smoke. No sticky hands that feel like you touched glue. Just tiny little s’mores-style bites you can grab from the fridge whenever you want something sweet.
And the dangerous part? You don’t “eat dessert.” You snack on it. One bite turns into three and suddenly the container looks suspiciously empty. Trust me, it happens fast.
These Homemade Smores snack bites are basically for:
- movie nights
- kids’ snacks
- lazy dessert cravings
- guests (because they look fancy-ish but are secretly easy)
- those random late-night “I want something sweet but not a whole cake” moments
Been there. Many times.
What These Taste Like (Quick Description)
Imagine s’mores… but cleaner. Still chocolatey. Still marshmallow-y. Still crunchy. But you don’t need to build anything, toast anything, or deal with uneven melting. It’s like the “cheat code” version.
And you know what I love most? The texture. The graham crumbs make it cozy and cookie-like. Chocolate chips give little pockets of sweetness. Marshmallows… Well, marshmallows are marshmallows. They make everything feel like a treat from childhood.
Equipment (You Barely Need Anything)
I’m not gonna lie, this is one of those recipes where you can get away with just a bowl and a spoon.
Here’s what helps:
- 1 big mixing bowl
- spoon or spatula
- measuring cups/spoons (but eyeballing works too… shhh)
- plate or tray
- parchment paper (optional, but keeps things neat)
- microwave-safe bowl if you melt chocolate
If you have a mini scoop, great. If not, your hands work. Hands are underrated kitchen tools.
Ingredients You’ll Need
Nothing weird. No “one teaspoon of unicorn dust.” Normal ingredients.
The main stuff:
- 1 ½ cups graham cracker crumbs
(or crushed digestive biscuits — totally fine) - ½ cup chocolate chips
(milk chocolate feels classic, dark chocolate feels grown-up) - ¾ cup mini marshmallows
- ¼ cup peanut butter
(almond butter also works… sunflower butter too) - 3 tablespoons honey or maple syrup
- 2 tablespoons melted butter (optional but makes it richer)
- ½ teaspoon vanilla extract
- pinch of salt (don’t skip, it balances sweetness)
Optional extras (if you like experimenting):
- a spoon of cocoa powder
- crushed pretzels (salty-sweet… so good)
- chopped nuts
- coconut flakes
- mini M&Ms (kids go crazy)
Quick note: the peanut butter is doing most of the “holding together” work here. So if you skip nut butter entirely, you’ll need another binder (I’ll mention options later).
How to Make Homemade Smores Snack Bites (My Real-Life Way)
Not the “perfect influencer version.” The real Homemade Smores Snack Bites version.
Step 1: Crush the graham crackers
If you already have crumbs, cool. If not, toss crackers/biscuits into a zip bag and crush them.
Rolling pin works. A heavy bottle works. Your fist works (careful though).
It’s honestly kind of satisfying.
You want a crumb texture like sand. But if you’ve got a few chunky bits? Keep them. Adds crunch. Life isn’t perfect.
Step 2: Mix the sticky base first
In your bowl, add:
- peanut butter
- honey or maple syrup
- melted butter (if using)
- vanilla
- pinch of salt
Mix it until it looks smooth and glossy.
At this stage it smells like “dessert promise.”
Also… you’re allowed to taste. I always taste.
Step 3: Add crumbs and mix
Add graham crumbs slowly and stir. It’ll start turning into this thick, dough-like mixture.
This is the moment where you’ll think:
“Is this too dry?”
Then you’ll mix again and go:
“Oh wait… no. It’s fine.”
If it’s actually dry though, add a tiny splash of honey/maple. Like 1 teaspoon at a time. Don’t dump it all at once.
Step 4: Chocolate + marshmallows go in
Now throw in:
- chocolate chips
- half the mini marshmallows
Mix gently. Don’t smash the marshmallows too much. They’ll survive, but still… be kind.
You’ll notice the dough becomes more “bite-friendly.” Like snackable cookie dough.
Step 5: Roll into balls
Grab small portions and roll them into bite-sized balls. Around 1 to 1.5 inches.
If it sticks to your hands (it probably will), do one of these:
- chill the dough 10 minutes first
- rub a tiny bit of butter on your palms
- wet hands slightly (just a little)
This part is messy. But it’s messy. Like “I’m actually cooking” messy.
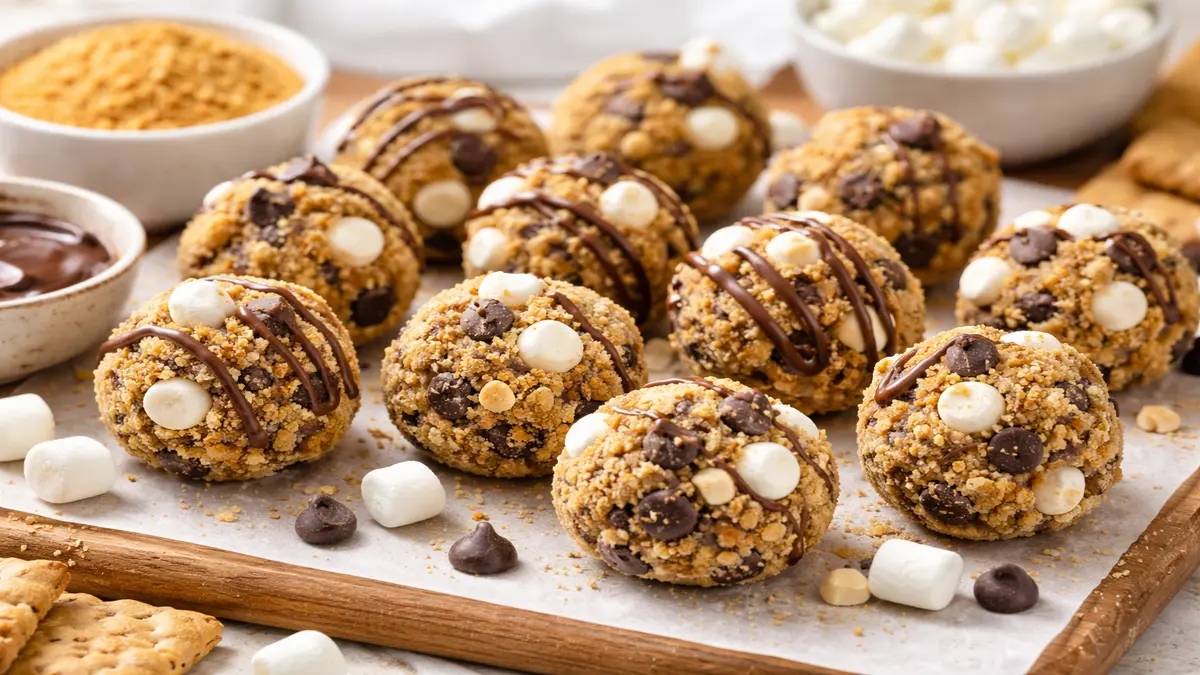
Step 6: Make them look extra s’mores-y
This is optional but fun:
Press extra marshmallows on the outside.
Roll some bites in graham crumbs.
Or drizzle melted chocolate over the top.
Now they don’t look like random snack balls… They look like planned desserts. And people are impressed. Love that.
Step 7: Chill
Put them in the fridge for 30–45 minutes.
They firm up, flavors settle, texture becomes perfect.
And yeah… you’ll probably eat one before they chill fully. It’s basically impossible not to.
Optional: How to Get the “Toasted Homemade Smores” Vibe Indoors
You know that slightly toasted marshmallow flavor? That part is special.
Two easy ways:
1. Broiler method
Place bites on a tray, broil for 30–60 seconds max.
DO NOT WALK AWAY.
I repeat — don’t walk away. They burn insanely fast.
2. Kitchen torch method
If you have a torch, toast the marshmallows lightly.
This makes you feel like a dessert wizard. Highly recommended.
Little Serving Ideas –Homemade Smores Snack Bites
Sometimes I serve these like a casual snack. Other times I act like I’m hosting a fancy café. Depends on mood.
- serve with hot cocoa
- serve with coffee
- stack them on a plate and drizzle chocolate
- add crushed graham crumbs around them like decoration
- freeze slightly and eat cold (it’s weirdly good)
Variations –Homemade Smores Snack Bites
Okay so the base Homemade S’mores is solid, but variations are where this gets fun.
Oreo S’mores Bites
Swap graham crumbs for crushed Oreos.
Not traditional… but wow. Like WOW.
Pretzel Crunch S’mores Bites
Add 2 tablespoons of crushed pretzels.
Sounds weird but… it works. Salty + sweet is undefeated.
Peanut Butter Cup Style
Use chopped mini peanut butter cups instead of chocolate chips.
This one disappears FAST. I don’t know why. It just does.
“Healthier-ish” Version
Use:
- dark chocolate chips
- almond butter
- maple syrup
- add chia seeds or flax
Still dessert. Just a slightly more responsible dessert.
Vegan Version
Use vegan marshmallows + dairy-free chocolate + maple syrup.
Still super tasty.
Health Benefits –Homemade Smores Snack Bites
Look… these aren’t kale Homemade Smores Snack Bites. But they’re not the worst snack either.
Here’s why they’re kind of okay:
- nut butter gives some healthy fats + keeps you full
- you control sugar amount
- dark chocolate = antioxidants (yes I’m using that excuse)
- portion sizes are naturally smaller
So it’s a treat. But it’s a manageable treat. Not a sugar bomb the size of your face.
Nutrition (Approx. Per Bite)
Rough estimate for 1 Homemade Smores Snack Bites:
- Calories: 100–125
- Carbs: 13–16g
- Fat: 4–7g
- Protein: 2g
- Sugar: 8–11g
If you make them bigger… you already know. Numbers go up.
But also: happiness goes up.
Homemade Smores Snack Bites
Ingredients
Equipment
Method
- If you already have crumbs, cool. If not, toss crackers/biscuits into a zip bag and crush them.
- Rolling pin works. A heavy bottle works. Your fist works (careful though).
- It’s honestly kind of satisfying.
- You want a crumb texture like sand. But if you’ve got a few chunky bits? Keep them. Adds crunch. Life isn’t perfect.
- In your bowl, add:
- peanut butter
- honey or maple syrup
- melted butter (if using)
- vanilla
- pinch of salt
- Mix it until it looks smooth and glossy.
- At this stage it smells like “dessert promise.”
- Also… you’re allowed to taste. I always taste.
- Add graham crumbs slowly and stir. It’ll start turning into this thick, dough-like mixture.
- This is the moment where you’ll think:
- “Is this too dry?”
- Then you’ll mix again and go:
- “Oh wait… no. It’s fine.”
- If it’s actually dry though, add a tiny splash of honey/maple. Like 1 teaspoon at a time. Don’t dump it all at once.
- Now throw in:
- chocolate chips
- half the mini marshmallows
- Mix gently. Don’t smash the marshmallows too much. They’ll survive, but still… be kind.
- You’ll notice the dough becomes more “bite-friendly.” Like snackable cookie dough.
- Grab small portions and roll them into bite-sized balls. Around 1 to 1.5 inches.
- If it sticks to your hands (it probably will), do one of these:
- chill the dough 10 minutes first
- rub a tiny bit of butter on your palms
- wet hands slightly (just a little)
- This part is messy. But it’s messy. Like “I’m actually cooking” messy.
- This is optional but fun:
- Press extra marshmallows on the outside.
- Roll some bites in graham crumbs.
- Or drizzle melted chocolate over the top.
- Now they don’t look like random snack balls… They look like planned desserts. And people are impressed. Love that.
- Put them in the fridge for 30–45 minutes.
- They firm up, flavors settle, texture becomes perfect.
- And yeah… you’ll probably eat one before they chill fully. It’s basically impossible not to.
Storage Tips –Homemade Smores Snack Bites
These Homemade Smores Snack Bites are easy but they can get dramatic if stored wrong.
In the fridge:
- airtight container
- stays good for about 7 days
- best taste + texture when chilled
On the counter:
Honestly? Not ideal. Marshmallows get soft, everything loosens up.
You can keep them out for a couple hours during serving though.
Related Recipes
- Texas Roadhouse Italian Dressing Recipe
- Smoked Chicken Rub Recipe
- Father of the Brine Recipe
- Smoked Chicken Rub
Extra Tip Section: Avoid Freezing Mistakes & Texture Disasters for Homemade Smores Snack Bites
You asked for this Homemade Smores Snack Bites specifically—so here’s the real talk version.
Can you freeze Homemade S’mores snack bites?
Yes. 100%.
But… freezing has rules.
How to freeze properly:
- Chill bites first in fridge (so they’re firm)
- place them in a freezer-safe container
- separate layers with parchment paper
- seal tightly
They stay good for up to 2 months.
Common freezer problems (and fixes)
Problem 1: Weird freezer smell
Fix: always seal properly. Don’t freeze uncovered. Ever.
Problem 2: Marshmallows become chewy
That’s normal sometimes. To reduce it:
- don’t leave marshmallows exposed on the outside
- roll bites in graham crumbs instead
Problem 3: Bites crack when thawed
That means the mixture was too dry.
Fix next time: add a little extra honey/maple or nut butter.
How to thaw
Let them sit for 10–15 minutes at room temperature.
Don’t microwave unless you want a melted mess (sometimes fun, but messy).
FAQs –Homemade Smores Snack Bites
Can I make these without peanut butter?
Yes. Use almond butter, cashew butter, sunflower butter, or cookie butter.
If using cookie butter… they’ll be sweeter. But also incredible.
Can I use marshmallow fluff instead of mini marshmallows?
You can. But it gets sticky FAST.
Reduce honey slightly and add more crumbs.
Do I need melted chocolate?
Nope. Chips work great.
But if you want prettier bites… drizzle chocolate on top. Instant upgrade.
Why is my mixture not sticking?
Usually too dry.
Add 1 teaspoon honey or nut butter, mix again.
Why is my mixture too sticky?
Too much liquid binder.
Add more graham crumbs and chill for 10 minutes.
How many bites does this make?
Usually 14–18 depending on size.
And yes, “taste testing” during rolling is mandatory.
Final Thoughts –Homemade Smores Snack Bites
Honestly, these homemade smores snack bites are my go-to when I want that classic s’mores flavor but don’t want the whole campfire mess.
You still get everything you love—crunchy graham crumbs, chocolatey little bites, and marshmallows that make it feel extra fun… just without the smoke in your hair or the “oops I burned it again” moment.
I also love how low-effort they are. No oven, no complicated steps, just mix everything up, roll into bites, and let the fridge do the rest. And once they’re chilled?
They’re so easy to Homemade Smores Snack Bites on. Like, maybe too easy.
Trust me.
I am continuously browsing online for tips that can facilitate me. Thanks!