A fun and easy Rainbow Butter Slime recipe with simple steps, texture tips, storage hacks, and real-life tricks for soft, smooth, buttery slime.
Introduction — Okay, So Let Me Be Honest For A Second…
The first time I tried making rainbow butter slime recipe, I completely messed it up.
Like, fully.
Sticky hands. Weird texture. Colors turning into a muddy mess instead of a cute Rainbow Butter Slime Recipe. Total chaos.
And the funny part? I was following a “perfect” recipe online.
But here’s the thing no one really tells you — slime making is less like baking and more like… feeling your way through it. A bit intuitive. A bit of trial and error. A little messy. A little fun.
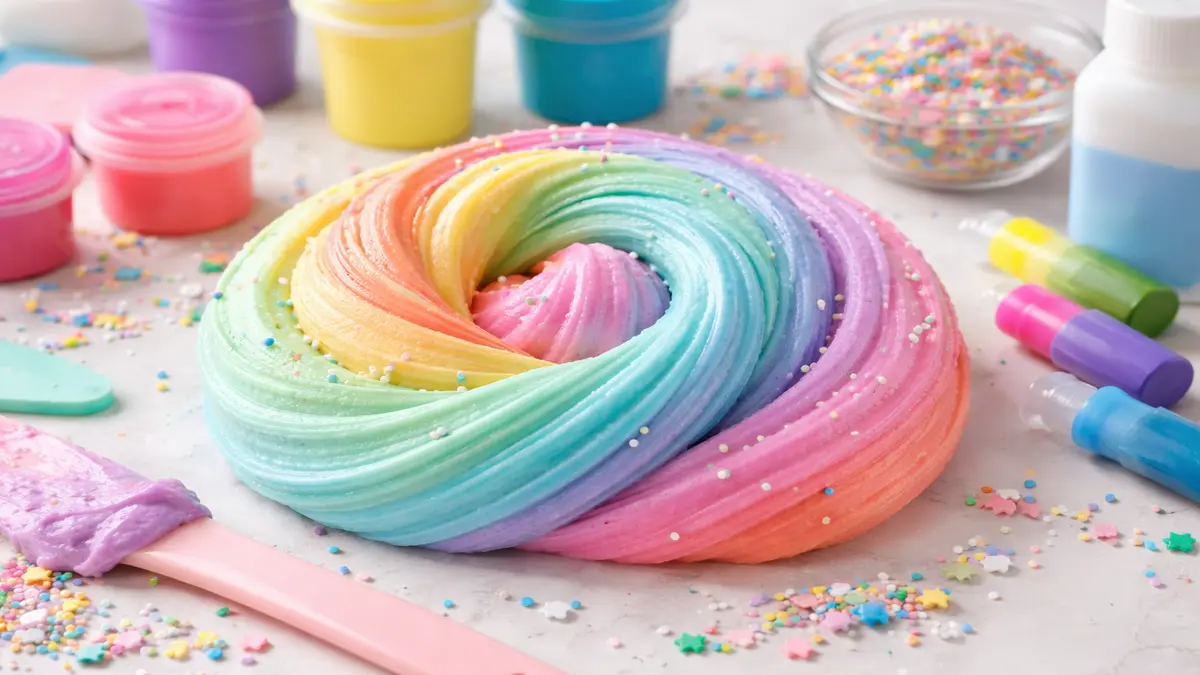
If you’re here looking for a Rainbow Butter Slime recipe, you probably want that soft, stretchy, pastel-looking, super satisfying slime that spreads like butter and looks insanely aesthetic in photos.
Not the rubbery kind.
Not the overly sticky kind.
Not the sad, stiff blob kind.
Been there. Made that. I regretted it.
So in this guide, I’m not going to sound like a robotic instruction manual. Nope. I’ll walk you through it like we’re literally in the kitchen or at a craft table together — mixing, fixing texture, laughing at mistakes, and adjusting as we go.
Because honestly? That’s how the best Rainbow Butter Slime Recipe actually gets made.
What Is Rainbow Butter Slime Recipe (And Why It Feels Weirdly Addictive)
So, Rainbow Butter Slime Recipe doesn’t actually contain butter. Sounds obvious, but kids always ask. And yes… adults too sometimes.
Rainbow Butter Slime Recipe is a soft, clay-based slime that feels smooth, spreadable, and slightly dough-like. When you press it, it kind of folds instead of stretching super thin like glossy slime.
Now add rainbow colors to that texture?
Yeah.
It becomes a whole sensory experience.
Soft.
Colorful.
Stretchy.
Calming.
And oddly satisfying in a way that’s hard to explain unless you’ve touched it.
I’ve noticed something funny — even people who say “I’m not into slime” end up playing with butter slime for like 10 minutes straight. Quietly. Without admitting it.
Trust me, it happens.
Equipment You’ll Need (Don’t Overthink This Part)
You really don’t need anything fancy. No professional tools. No expensive kits. Just basic stuff lying around your house.
Here’s what I usually grab:
- 2–3 medium mixing bowls
- A spoon or silicone spatula
- Measuring cups (or just estimate, honestly)
- Airtight containers (VERY important later)
- A clean flat surface or tray
- Paper towels (because… spills will happen)
Quick side note — avoid using your best kitchen bowls. Glue + food coloring has a talent for staining when you least expect it. Learned that lesson the hard way.
Ingredients For Soft Rainbow Butter Slime Recipe (Simple But Powerful)
This Rainbow Butter Slime Recipe looks simple on paper. Almost too simple. But the magic is in the mixing and texture adjustments, not just the ingredients.
Core ingredients:
- 1 cup white school glue (PVA glue works best)
- 2 cups shaving cream (for fluffiness)
- 1 teaspoon baking soda
- Contact lens solution (with boric acid)
- Soft air-dry clay (this is the butter texture secret)
- Food coloring or slime dye (rainbow colors)
- A little lotion (optional but very helpful)
Sounds easy, right?
Yeah… until texture enters the chat.
But don’t worry. I’ll guide you through the real way, not the “perfect Instagram version.”
Step-by-Step Rainbow Butter Slime Recipe Method (The Real Kitchen Style Way)
Step 1 – Pour the Glue (Start Calm, Not Rushed)
Take a large bowl and pour in one cup of white glue.
Pause for a second.
Look at it.
It’s plain. Boring. Slightly shiny. Totally normal.
Give it a gentle stir just to smooth it out. No aggressive mixing yet. This isn’t a race.
Step 2 – Add Shaving Cream (This Is Where It Gets Fun)
Now add about two cups of shaving cream.
And yes, it will look like a fluffy cloud suddenly appeared in your bowl.
Mix slowly.
Then a bit faster.
Then slow again.
You’ll notice the mixture becoming airy and light — almost like whipped frosting. Which, by the way, looks edible but absolutely is NOT. Please don’t taste it. Been there as a kid. Regret level: high.
Step 3 – Baking Soda Time (Small But Important Step)
Add one teaspoon of baking soda.
Not a tablespoon.
Not “a lot.”
Just a teaspoon.
Mix thoroughly until everything looks smooth. No powder lumps. No dry pockets. Just a soft, fluffy base.
Step 4 – Divide For Rainbow Colors (Slow Down Here)
Now split the mixture into separate bowls depending on how many colors you want.
Classic rainbow setup:
- Red
- Orange
- Yellow
- Green
- Blue
- Purple
Add a few drops of food coloring into each bowl.
Here’s a real tip — start with less color than you think you need.
You can always add more.
But fixing overly dark slime? Ugh. Annoying.
Mix each color slowly and enjoy the process. This part is oddly relaxing. Almost meditative, honestly.
Step 5 – Activate The Slime (Patience… Seriously)
Now comes the sensitive part.
Add contact lens solution a few drops at a time while mixing.
Not a full pour.
Not a rush.
Drops.
Mix.
Check texture.
Repeat.
You’ll notice the slime slowly pulling away from the bowl edges.
That’s the exact moment you want.
If it’s still sticky, add a tiny bit more activator.
Tiny.
Not dramatic.
Over-activating is the number one mistake. And yes… I’ve ruined batches by doing that.
Step 6 – Add Air-Dry Clay (The Butter Texture Moment)
Now this is the real transformation step.
Take a chunk of soft air-dry clay and knead it into each colored slime portion.
At first?
It will feel weird.
Sticky.
Slightly messy.
Kind of stubborn.
Keep kneading.
Don’t give up early.
After 2–4 minutes, the texture suddenly changes. It becomes soft, smooth, stretchy, and — finally — buttery.
That’s the moment you’ll go: “Ohhh… now I get it.”
Step 7 – Creating The Rainbow Swirl (My Favorite Part)
Place all colored slimes side by side on a clean surface.
Then gently fold them together.
Not aggressively mixing.
Not smashing.
Just fold… stretch… twist… slowly.
The colors will naturally swirl into a beautiful rainbow pattern.
And honestly? This part never gets old.
Texture Troubleshooting (Because Things WILL Go Wrong Sometimes)
Let’s talk about real-life issues.
If Your Slime Is Too Sticky
Add a few drops of activator and knead slowly.
Not panic mode. Just patience.
If It’s Too Hard
Add lotion.
Or a tiny bit of shaving cream.
Then knead again.
If It Tears Instead of Stretching
It needs more kneading. Simple as that.
Clay + slime takes time to fully blend.
Slime is more about feel than strict measurements. Sounds vague, but it’s true.
Variety Ideas (For When You Get Slightly Obsessed Like I Did)
Scented Rainbow Butter Slime Recipe
Add fragrance oil like vanilla or strawberry.
Smells amazing. Makes the experience 10x better.
Glitter Rainbow Slime
Add fine glitter. Just a pinch.
Too much glitter ruins the soft texture. I learned this after making a crunchy disaster batch.
Pastel Rainbow Slime
Use soft pastel colors instead of bright shades.
Very aesthetic. Very calming visually.
Cloud Butter Slime
Mix in instant snow powder for a fluffy, airy feel.
Sounds weird but… incredibly satisfying.
Health & Safety (Short But Important Talk)
Okay quick serious moment.
- Do not eat the slime
- Wash hands after playing
- Keep away from small children unsupervised
- Avoid eye contact
- Use non-toxic glue only
Also, if you have sensitive skin, gloves are a smart idea. Some activators can cause mild irritation.
Storage Tips (So Your Slime Doesn’t Dry, Melt, Or Freeze)
This part is underrated.
Like seriously underrated.
Always store Rainbow Butter Slime Recipe in an airtight container.
Always.
Keep it away from:
- Direct sunlight
- Heaters
- Very cold areas
Yes, slime can freeze in extreme cold.
And frozen slime becomes stiff, crumbly, and honestly sad to play with.
If slime starts drying out:
Add a drop of lotion and knead slowly.
Works surprisingly well most of the time.
Extra Tips To Avoid Common Rainbow Butter Slime Recipe
Don’t over-activate the slime.
That turns it rubbery instantly.
Don’t mix all colors too fast.
Or you’ll end up with a brown blob instead of a rainbow.
Been there. Not cute.
Don’t use cheap glue if possible.
Quality glue = better texture.
It actually matters more than people think.
And honestly?
Take breaks while kneading.
Your hands get tired faster than expected.
Related Recipes
- Texas Roadhouse Italian Dressing Recipe
- Smoked Chicken Rub Recipe
- Father of the Brine Recipe
- Smoked Chicken Rub
FAQs – Rainbow Butter Slime Recipe
Is rainbow butter slime recipe safe for kids?
Yes, if made with non-toxic ingredients and used under supervision.
Why is my butter slime sticky even after activating?
Most likely it needs more kneading, not more activator.
How long does butter slime last?
Usually 2–4 weeks if stored properly in airtight containers.
Can I make it without clay?
You can, but it won’t have that buttery, spreadable texture.
Clay is the key ingredient.
Can slime be refrigerated?
Not recommended. Cold temperatures change the texture and make it stiff.
Final Thoughts (Like Talking To A Friend After Making Slime)
Honestly, rainbow butter slime recipe is one of those simple activities that feels way more satisfying than expected.
It’s creative.
Slightly messy.
Colorful.
And weirdly relaxing after a long day.
Your first batch might not be perfect.
Mine definitely wasn’t.
It was sticky, uneven, and slightly chaotic.
But after a few tries?
You start understanding the texture naturally.
Not by memorizing steps.
But by feeling it.
Adjusting it.
Fixing it as you go.
And that’s the fun part.
So don’t stress about making it perfect.
Enjoy the process.
Laugh at the mess.
Fix the texture slowly.
Because once you finally make that soft, stretchy, smooth rainbow butter slime with the perfect buttery feel…
You’ll play with it way longer than you planned.
Trust me on that.
1 thought on “Rainbow Butter Slime Recipe (The Real, Messy, Colorful Version I Wish Someone Told Me First)”