Homemade granola Recipe made the real way—simple ingredients, easy steps, nutrition, and an honest kitchen story.
I didn’t wake up one day deciding to become a “make your own granola” person.
It happened gradually. Quietly.
I used to buy granola all the time. Every packet looked promising. Words like wholesome, natural, low sugar. Then I’d open it, pour it into yogurt, take a bite… and feel slightly cheated. Too sweet. Or oddly bland. Or crunchy in a way that felt forced.
One afternoon, mostly out of annoyance, I made Homemade Granola Recipe at home.
No scale. No strict recipe.
That batch wasn’t perfect.
But it was mine.
And that’s how Homemade Granola Recipe became a thing in my kitchen.
What Homemade Granola Recipe Actually Is (When You Strip It Down)
Granola sounds like a “health food”, but it’s really very basic.
At its core, granola is:
Oats + fat + a little sweetness + heat.
Everything else is optional.
In real life, granola is:
- Breakfast when mornings are rushed
- Crunch on top of yogurt
- Something you snack on without thinking
- A jar that slowly empties without notice
Some batches clump.
Some don’t.
Some are darker than planned.
Still granola.
My First Real Homemade Granola Recipe Mistake
I burned the edges.
Not badly—but enough to notice. I was distracted, stirring too late. Thought about throwing the whole thing away.
Didn’t.
I picked out the darkest bits and tasted the rest.
Still good.
That’s when I learned something useful: granola doesn’t demand perfection. It asks for attention—but forgives distraction.
Why Making Homemade Granola Recipe at Home Actually Makes Sense
Here’s why Homemade Granola Recipe sticks around:
- You decide how sweet it is
- You choose the crunch level
- It’s cheaper over time
- It tastes fresher
- Your kitchen smells amazing
Too sweet? Adjust the next batch.
Too dry? Add a bit more oil.
Not crunchy enough? Bake longer.
Granola teaches by repetition.
Equipment You Need (Nothing Fancy)
Let’s keep this grounded.
You’ll need:
- A large mixing bowl
- A baking tray
- Parchment paper (or light greasing)
- A spoon or spatula
- An oven
That’s all.
No blender. No food processor.
Granola doesn’t care about gadgets.
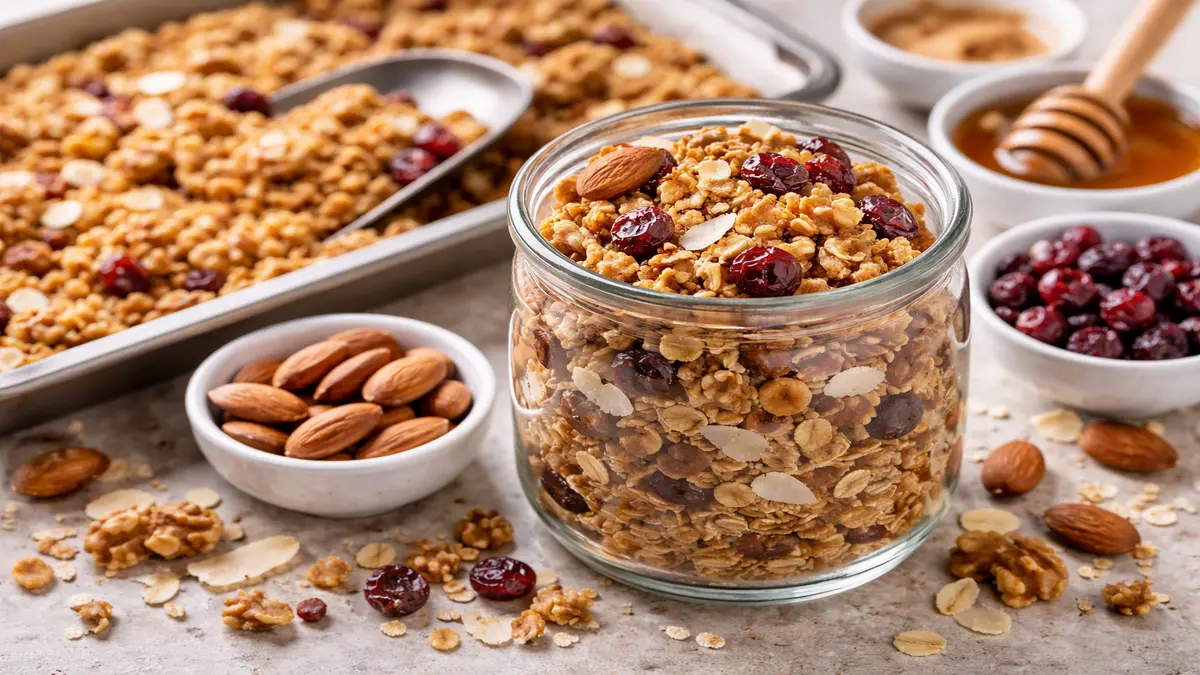
Ingredients for a Real, Flexible Homemade Granola Recipe Batch
This is a base recipe. Think of it as a starting point, not a rule.
Base
- Rolled oats – 3 cups
- Mixed nuts (almonds, walnuts, cashews) – 1 cup, roughly chopped
- Seeds (pumpkin, sunflower, sesame) – ½ cup
- Oil (coconut or olive) – ¼ cup
- Honey or maple syrup – ¼ cup
- Salt – ½ teaspoon
Flavor (Optional)
- Cinnamon – 1 teaspoon
- Vanilla extract – 1 teaspoon
After Baking
- Dried fruit (raisins, cranberries, chopped dates) – ½ cup
- Coconut flakes – ¼ cup
- Dark chocolate chips – ¼ cup
You don’t need everything.
Simple granola is often the best granola.
How I Actually Make Homemade Granola Recipe(No Drama)
Step 1: Heat the Oven
Preheat to 170°C / 340°F.
Line your tray. Do this now—you’ll forget later.
Step 2: Mix the Dry Stuff
In a big bowl, mix oats, nuts, seeds, salt, and cinnamon.
This is the calm part.
Step 3: Add the Wet Stuff
Pour in oil and sweetener. Add vanilla if using.
Mix until everything looks lightly coated—not swimming.
Step 4: Spread It Out
Spread evenly on the tray. Don’t press it down too much.
Clusters need space.
Step 5: Bake
Bake for 20–25 minutes. Stir once halfway.
Don’t walk away completely. Granola turns fast.
Step 6: Cool Properly
This matters more than people say.
Granola crisps up as it cools.
Leave it alone if you want clusters.
Step 7: Add Extras
Once fully cool, add dried fruit or chocolate.
Then store it. Or snack immediately. Both acceptable.
Sounds Weird But…
Sounds weird but granola tastes better the next day.
The crunch settles.
The flavors calm down.
If you can wait, wait.
Homemade Granola – Serving Suggestions
- With cold milk for a quick breakfast
- Over yogurt + fresh fruits (parfait style)
- Sprinkle on smoothie bowls for crunch
- With warm stewed apples or pears
- Mix with nuts, seeds, or nut butter for extra richness
- As a topping for ice cream or desserts
- Add a handful to fruit salads
- Enjoy as a grab-and-go snack
Best stored airtight and served crunchy
Homemade Granola Recipe Variations That Actually Get Made Again
Classic Nut Granola
Oats, nuts, honey, oil.
Simple. Reliable.
Chocolate Granola
Add cocoa powder before baking. Chocolate chips after.
Feels indulgent. Isn’t wild.
Fruit & Nut Granola
Dried fruit added at the end.
Sweet bursts. Balanced.
Peanut Butter Granola
Add 2 tablespoons peanut butter to the wet mix.
Rich. Filling. Comforting.
Low-Sugar Granola
Less sweetener. More nuts and seeds.
Not dessert-like—but very good with yogurt.
Health Benefits (Let’s Be Real)
Granola isn’t magic food.
But homemade granola can support:
- Digestion (fiber from oats)
- Steady energy release
- Heart health (nuts & seeds)
- Feeling full longer
It’s not “diet food”.
It’s supportive food.
And that’s better.
Nutrition (Approximate, ½ Cup Serving)
- Calories: 220–250 kcal
- Carbohydrates: 25–30 g
- Protein: 5–7 g
- Healthy fats: 10–12 g
- Fiber: 4–6 g
Numbers change with ingredients—but homemade lets you choose.
Is Homemade Granola Recipe Good for Weight Control?
It can be.
But portion matters more than ingredients.
Granola is dense. Easy to overdo.
Use it as:
- A topping, not a bowl full
- A measured snack, not a handful habit
Crunch slows eating. That helps.
How Homemade Granola Recipe Fits Into Real Days
From real life:
- With Greek yogurt in the morning
- With milk when you want comfort
- Sprinkled on fruit
- Straight from the jar while thinking
Some days it’s breakfast.
Some days it’s just crunch therapy.
Homemade Granola Recipe
Ingredients
Equipment
Method
- Preheat to 170°C / 340°F.
- Line your tray. Do this now—you’ll forget later.
- In a big bowl, mix oats, nuts, seeds, salt, and cinnamon.
- This is the calm part.
- Pour in oil and sweetener. Add vanilla if using.
- Mix until everything looks lightly coated—not swimming.
- Spread evenly on the tray. Don’t press it down too much.
- Clusters need space.
- Bake for 20–25 minutes. Stir once halfway.
- Don’t walk away completely. Granola turns fast.
- This matters more than people say.
- Granola crisps up as it cools.
- Leave it alone if you want clusters.
- Once fully cool, add dried fruit or chocolate.
- Then store it. Or snack immediately. Both acceptable.
- Sounds weird but granola tastes better the next day.
- The crunch settles.
- The flavors calm down.
- If you can wait, wait.
Homemade Granola Recipe – Avoid These Common Mistakes
- Too much liquid sweetener/oil → clumpy and greasy
- Not mixing dry ingredients well → uneven flavor
- High oven temperature → burns fast (low & slow is best)
- Stirring too often → prevents nice clusters from forming
- Adding nuts too early → they can burn before oats toast
- Adding dried fruit before baking → fruit turns hard and bitter
- Not letting it cool fully → won’t crisp up
- Under-seasoning → pinch of salt boosts flavor
Tip: Let it cool untouched on the tray — that’s when crunch and clusters form
Homemade Granola Recipe – Storage Suggestions
- Store in an airtight container (jar or sealed box)
- Keep at room temperature in a cool, dry place
- Stays fresh for 2–3 weeks
- For longer storage, keep in the fridge (up to 1 month)
- Can be frozen for 2–3 months in a sealed bag
Tips
- Let granola cool completely before storing (prevents sogginess)
- Keep away from moisture — humidity kills the crunch
- If it softens, re-toast in oven for a few minutes to crisp again
Related Recipes
- Texas Roadhouse Italian Dressing Recipe
- Smoked Chicken Rub Recipe
- Father of the Brine Recipe
- Smoked Chicken Rub
FAQs (Short & Honest)
Is homemade granola healthier than store-bought?
Usually yes—less sugar, more control.
Can I skip honey?
Yes. Maple syrup or mashed dates work.
Why isn’t my granola crunchy?
Needs more bake time or full cooling.
How long does it last?
2–3 weeks in an airtight container.
Good for kids?
Yes, in moderate portions.
Can I reduce oil?
Yes, but crunch may suffer.
Why does it burn easily?
Sugar caramelizes fast—watch closely.
One Small Moment
Once I made granola late at night. No reason. I just wanted the smell.
I ate a small handful while it was still warm. Probably not ideal timing.
Still comforting.
Food doesn’t always need rules.
Final Thoughts (Nothing Fancy)
Granola doesn’t need perfection.
It needs attention.
Some batches will be perfect.
Some will be slightly off.
You’ll eat them anyway.
If you make granola tomorrow—
watch it bake.
let it cool.
let it crunch.
That’s the real recipe.